There are a few pieces that are required in order to write a check using the Check Writing portion of the Treasurer application: Banks, Bank Accounts, Payees, and Disbursement Periods. First, we will cover banks and bank accounts.
A Bank record holds all the information about a given bank, including things like the name, routing number, and any county accounts that might be present at that bank. A check can only be written from a bank that has at least one county account defined.
To add a new bank:
To Edit an existing Bank:
Disbursement Periods are used to group Payees together. This is useful when creating checks for Month End disbursements. A group can be defined as "Month End" and only the payees that are normally paid at this time can be part of this group. Selecting the right disbursement period is one of the first steps in the check generation process in the Check Wizard. These can be modified under Checks > Disbursement Periods or clicking the gear icon on the Payee Edit screen.
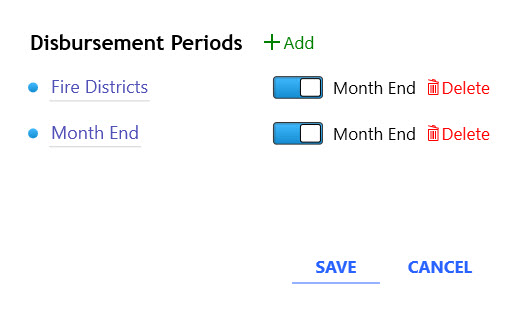
To manage disbursement periods:
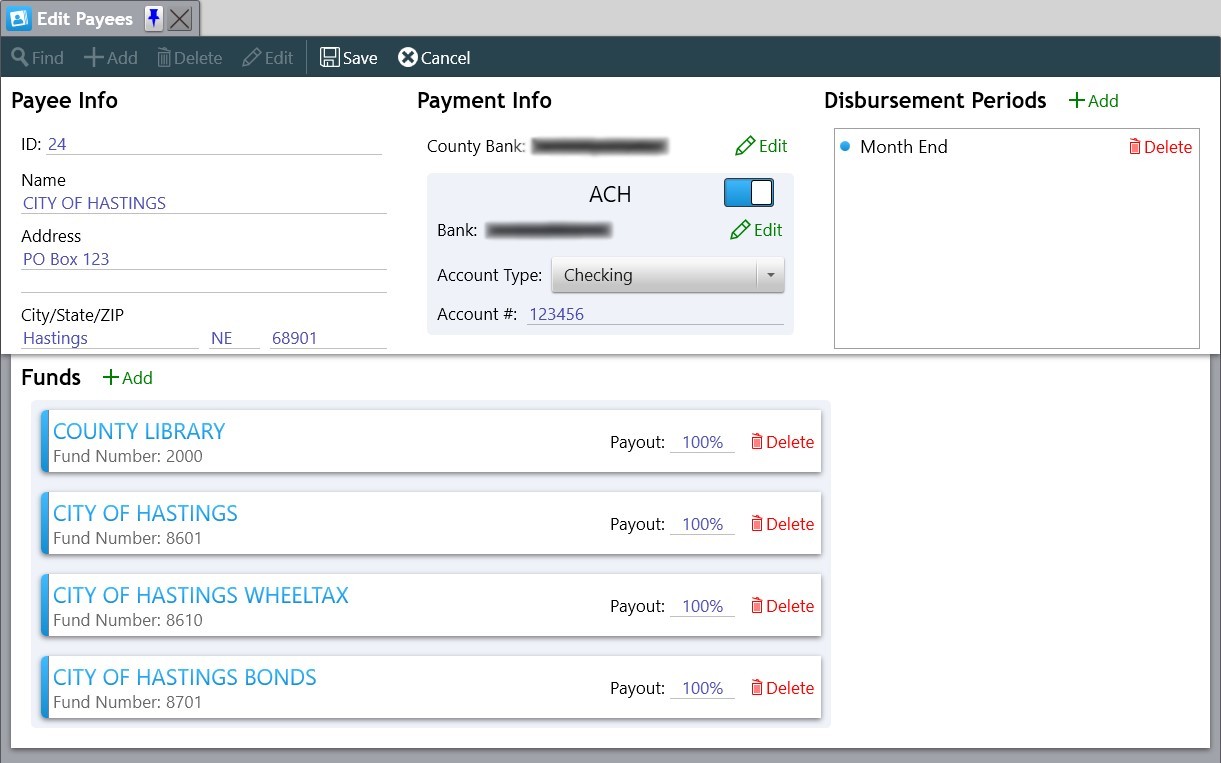
Payees are the people a check is written to and the heart of the check writing system. These records hold information about the person such as name and address, what funds are used to pay this person, the county bank account the money will come out of, and which disbursement periods the payee is a part of. If Generating ACH files, they also hold the information required for ACH transactions like what bank they bank at, and their account information. These records can be modified by going to Checks > Edit Payees.
The Check Wizard is where checks can be generated en masse for a specific disbursement period. The total of the checks is figured based on whether the selected disbursement period is a mid-month or month end period.
To Print Checks:
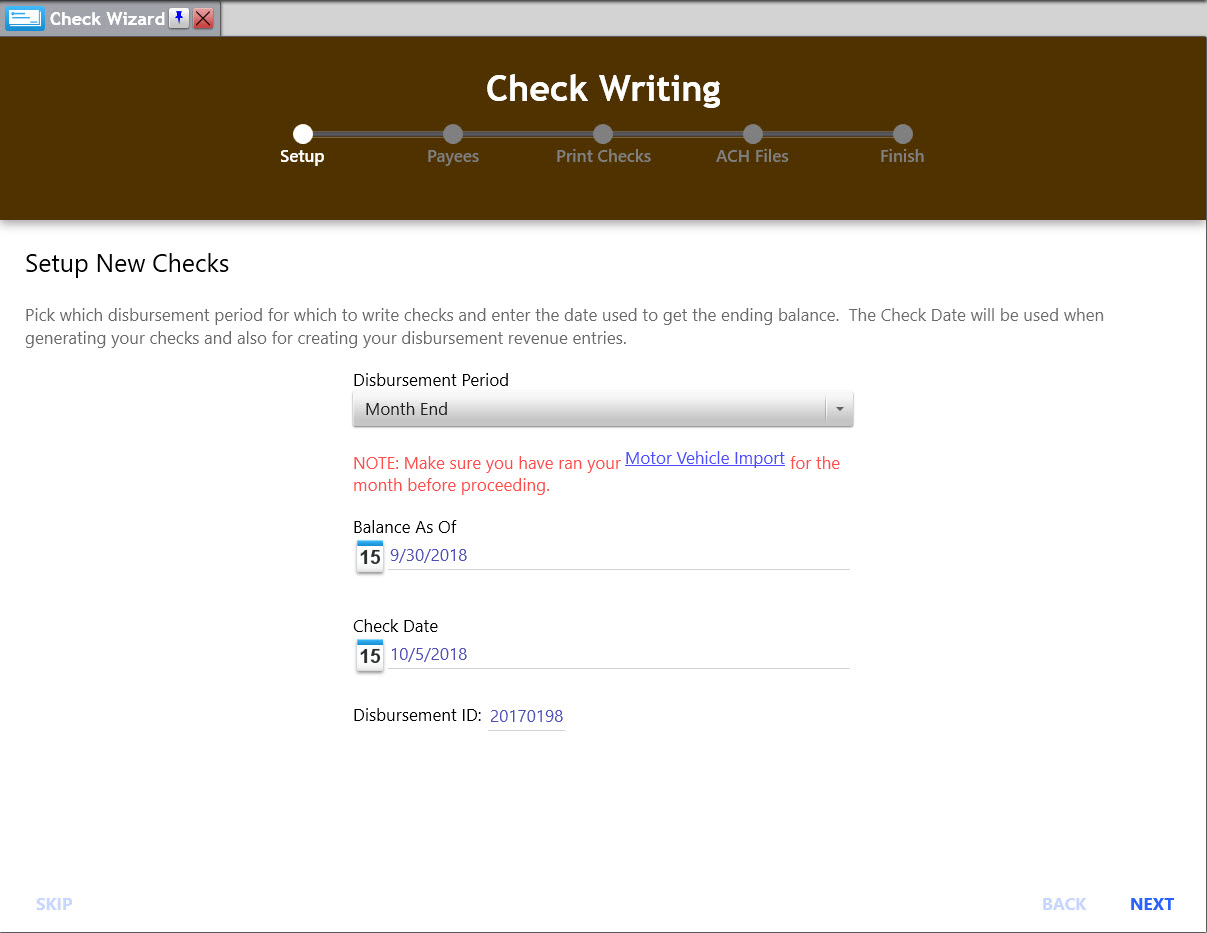
Go to Checks > Check Wizard. This will open the Check Writing Wizard.
On the first step, select which disbursement period for which checks should be created. Once the disbursement period is selected, choose the date for which to calculate a balance, and what date to put on the checks. There is also an option for specifying a different starting disbursement ID for the revenue entries that will get created with each check.
When doing a Mid-Month disbursement, the funds will be calculated using the Trial Balance method. With this method, the option is given to include motor vehicle taxes in the check amounts.
When doing a Month End disbursement, the funds will be calculated using any balances reported on the chart of accounts.
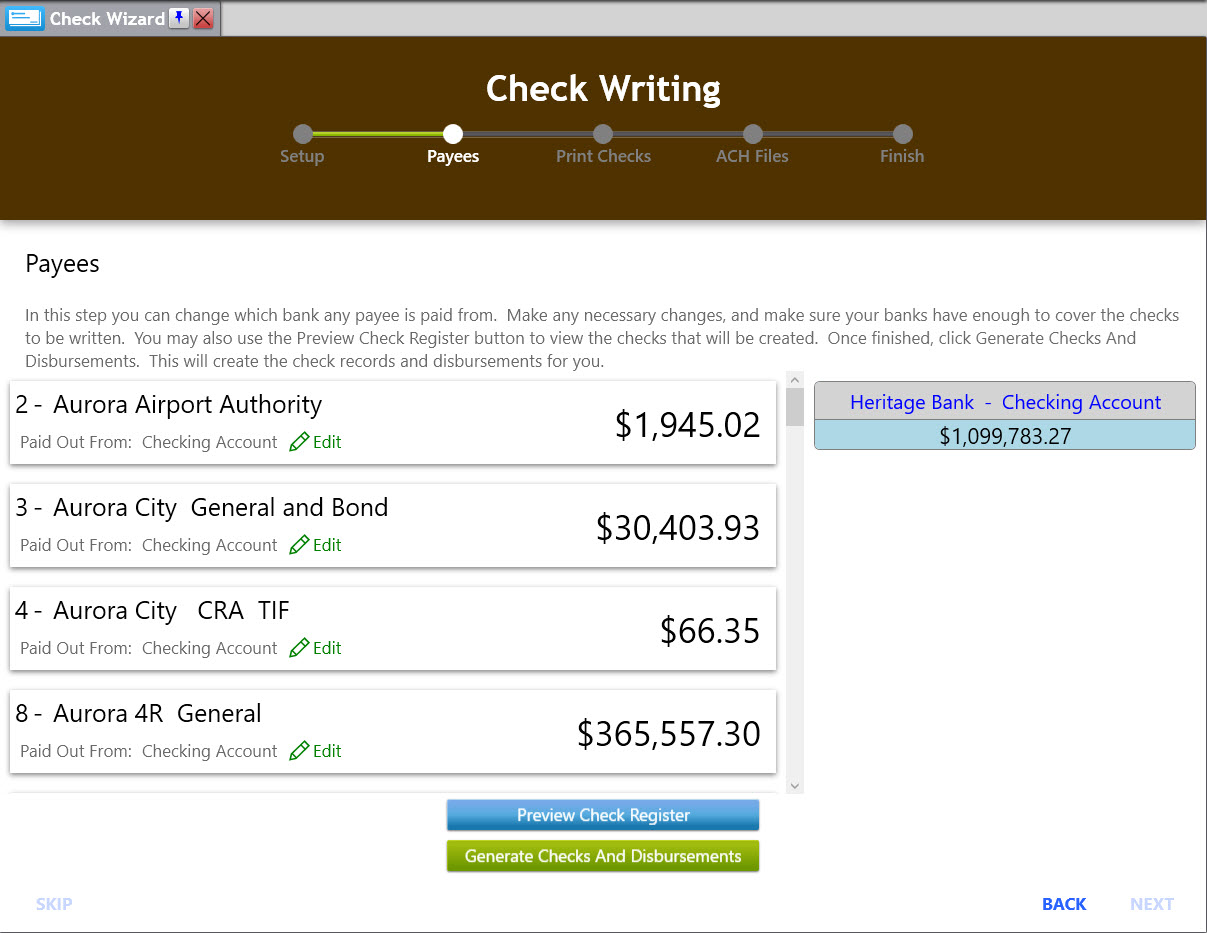
On the second step, you can preview all your payees, and adjust any bank accounts to pay them from, just in case a particular account doesn’t have enough funds to cover the check. Another option would be to transfer funds from a different account to the account that is deficient. You can also print a Preview Check Register that will outline all the checks to be printed, and a total for each bank. Clicking Generate Checks And Disbursements will create a check for each payee, and a matching disbursement record for you.
If there are physical checks to be printed, you will be taken to step 3. Before you start, you need to load your check stock into your printer. The bank that is to be printed shows at the top. Then you can specify a range of checks to print, ex: "2544-2552" or "1, 3, 5" or "1-4, 3". By default, it will print the whole range of checks that were generated. Click Print to start printing checks. Once you’re happy that all the checks are printed, click NEXT.
If there are any ACH records to be created, you will be taken to step 4. First, select where you would like the ACH file to be saved, so you know where to retrieve it later. Once selected, clicking Create ACH File will create and save the ACH file in the location you’ve chosen. If you are using more than one bank to pay from, you will be taken back to step 3 or 4 for the next bank after clicking NEXT until checks for all banks have been printed. Don’t forget to change your check stock in your printer between banks!! (In the screenshot above, you can see that we are printing bank 1 of 2)
Step 5 lets you know that everything finished, and we have nothing left to.
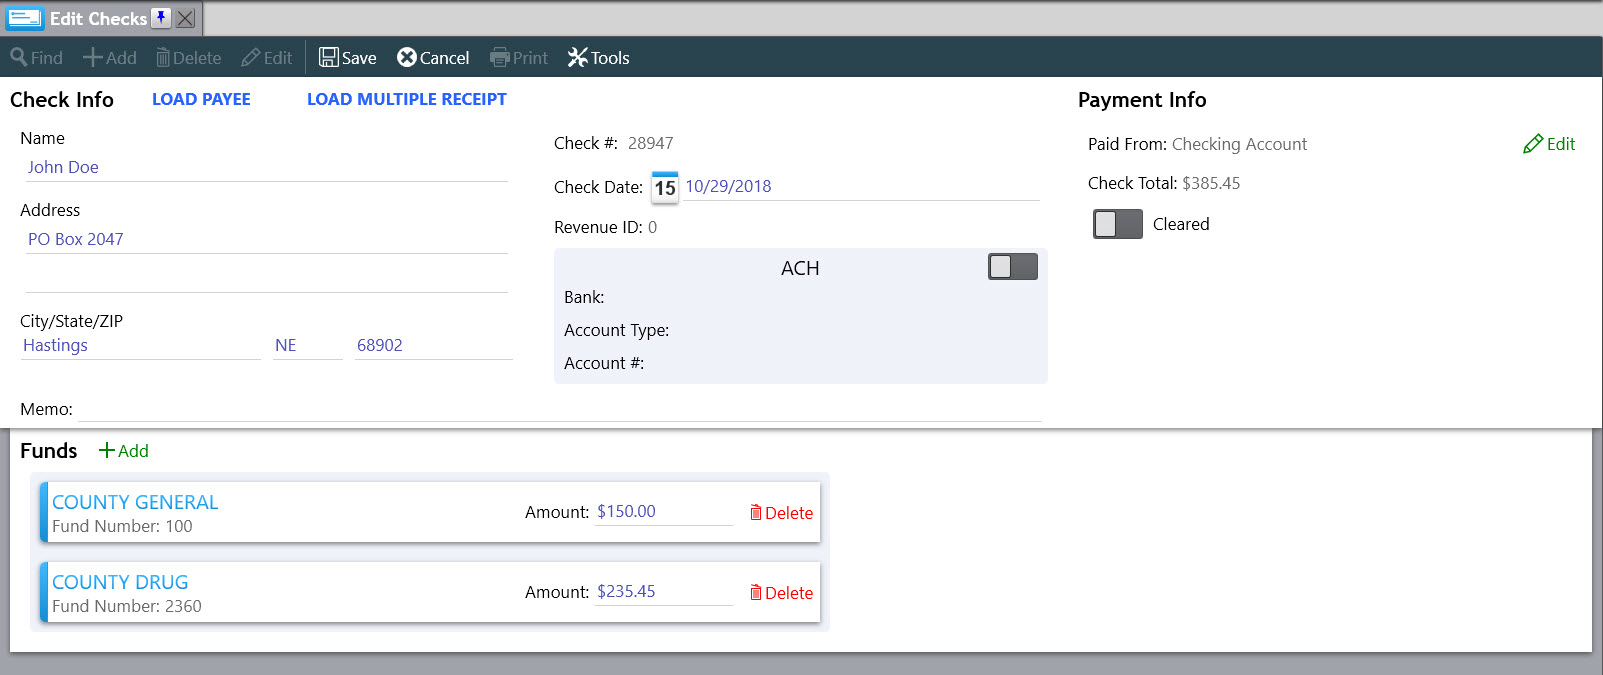
The system also has the capability to write ad-hoc checks either as a refund to a tax payer straight out of the checking account, or a sum of money to be disbursed from specific funds. This can be accomplished from the Edit Checks option under the Checks menu. The LOAD PAYEE and LOAD MULTIPLE RECEIPT buttons allow for populating the name and address fields from records in the system without the need to retype them.
When writing a check to a taxpayer as a refund, fill in the person’s name and address, the date for the check, specify the bank account the money is paid from, and the amount of the check. Optionally, a Memo can also be entered for the check. Once the information is entered the check can be saved and will be assigned the next available check number for the given bank account. Be sure the printer has the correct check stock loaded and then click the Print button in the toolbar to print the check.
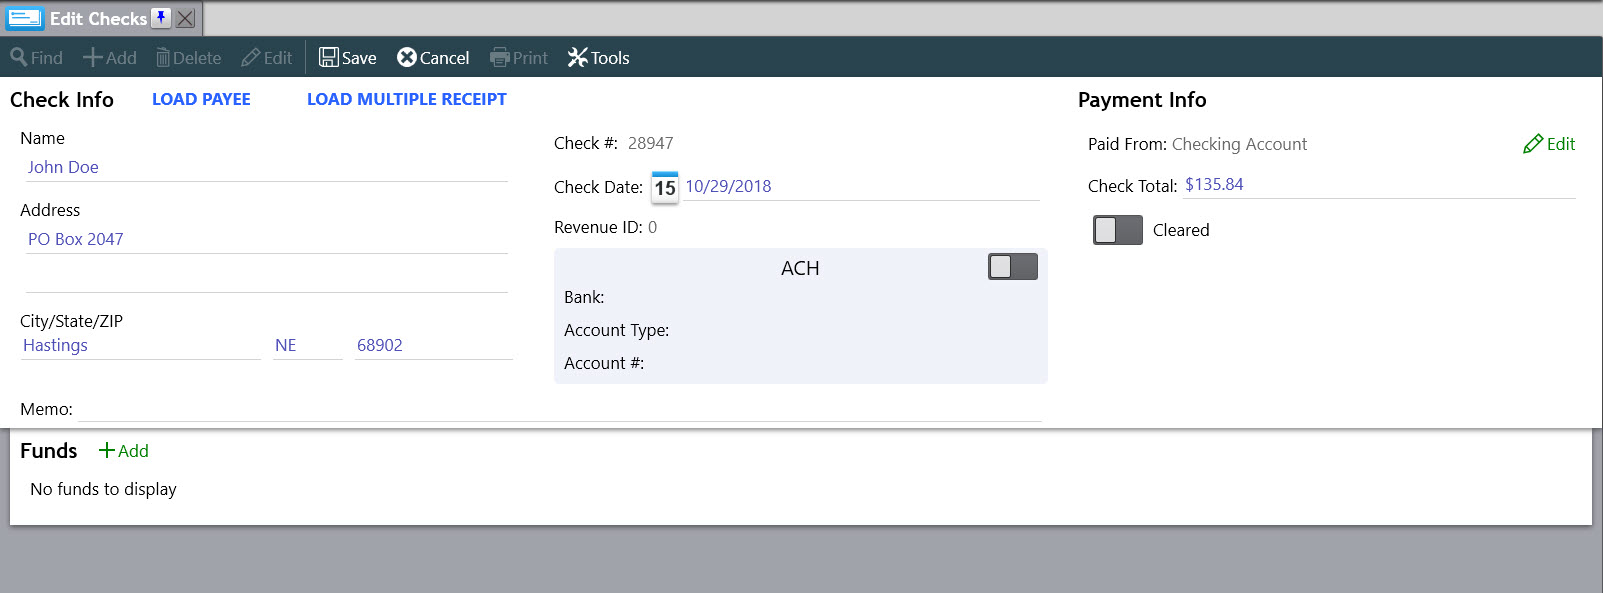
When writing a check to be disbursed from specific funds, it is very similar to an Ad-Hoc check. The only difference is that funds are specified on the check as to which funds the money comes from. This can be done by clicking Add under the Funds section. Once a fund is added, the amount to be disbursed from that fund can be specified. All the fund amounts will be totaled into the amount for the check. The check can then be saved and printed as usual. During the save process, a Disbursement Revenue Record will be created.
